A Complete Guide To Resealing An RV Roof (What You Need To Know!)
Whether you own an RV or are planning to purchase one at some point, it is important to know how to reseal an RV roof. If an RV roof becomes damaged and is no longer sealed, it can lead to costly water damage if water leaks through the roof.
How do you fix and reseal an RV roof?
To repair your RV roof, you need to determine the type of roof your RV has, clean the roof thoroughly, remove any peeling sealant, use the appropriate sealant for the type of roof and seal the entire roof or seams as necessary.
Properly inspecting and resealing your RV roof is a critical part of owning an RV and something you should add to your normal maintenance routine.
The information provided in this guide has been reviewed by industry experts and will allow you to properly caulk your RV roof.
How to Reseal an RV Roof
The first thing that needs to be done prior to resealing your RV roof is determining what type of roof your RV has. There are different materials and different processes depending on which type of roof is on your RV.
Rubber RV Roof
Many newer RVs come with a rubber roof. There are two types of rubber roofs: EPDM and TPO. TPO roofs will typically not need to be resealed, but EPDM roofs will potentially need resealing approximately every 10 to 15 years. It is important to never use a cleaner or sealant that is petroleum based on a rubber roof as it will cause permanent damage.
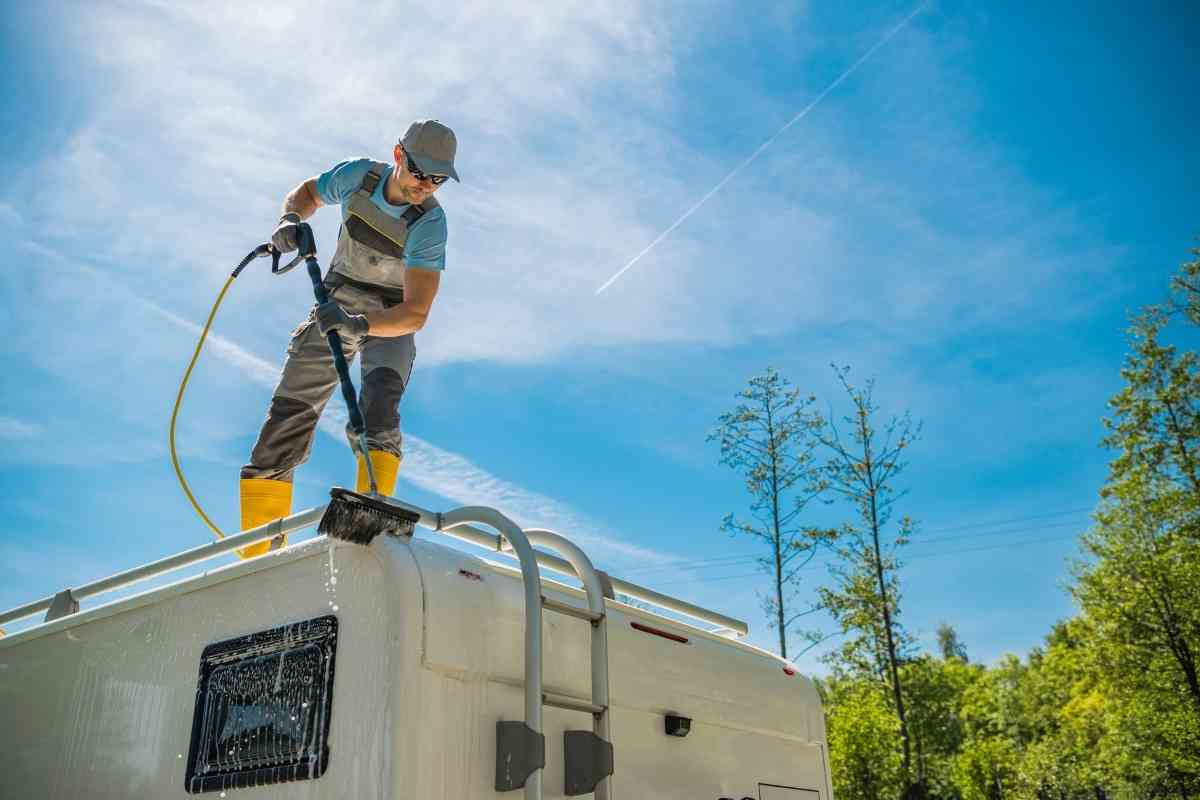
To begin, you want to clean the RV roof to remove any dust, dirt, and debris. You can use a broom to get the first layer off and then use a rag with dish soap and water to thoroughly clean the roof. After you clean it, you will want to inspect the roof, including all seams, to look for any visible cracks.
Be sure to use a sealant that is meant for rubber roofs when you do the repairs. You can use the sealant to fill any cracks in the roof. If your RV roof is an EPDM roof, then you will want to seal the entire roof with a sealant intended for an EPDM roof.
Metal RV Roof
Many older RVs have a metal roof, typically aluminum. You will know that the roof is ready for repair if the old sealant is flaking or peeling off.
To begin, you will want to clean off the metal roof to remove any excess dirt and dust. You can use a broom for this. At this point, you will want to use a hand scraper to remove any pieces of old sealant that are flaking and peeling. Do not remove any sealant unless it is flaking and peeling.
Clean the roof again with a rag and dish soap to ensure the roof is completely clean before putting new sealant on. Make sure that you are using a sealant that is intended for a metal roof. You can either seal the entire roof or just the seams depending on the condition of the roof.
Fiberglass RV Roof
Fiberglass RV roofs are the rarest type of RV roof you will come across. Some RVs from the 1980s and 1990s will have them, and very occasionally, a modern RV will have a fiberglass roof.
As with the other types of roofs, you will want to clean the roof off to remove any built-up dirt, dust, and debris. You can also use a hand scraper on a fiberglass roof to remove any sealant that is peeling and flaking.
If you are planning to just reseal the seams, then you will want to use a self-leveling sealant that is only intended for the seams. However, you also have the option to apply a canned sealant to the entire roof.
This will be applied using a paintbrush to the roof and all seams.

Types of RV Roof Sealants
Prior to resealing your RV roof, you will need to know exactly what your RV roof is made out of. If you are unsure, you can always look up the model of your RV to find out the material. Certain sealants can damage your RV roof if it is not intended for that type of roof material.
Self-Leveling Sealant
A self-leveling sealant is just as it sounds. When applied, it will level out on its own and create a smooth and even seal. It can be used almost anywhere on your RV roof that is flat.
Non-Sag Sealant
A non-sag sealant is going to be much thicker. It is best used in areas where it is not level because it will not leak or drip down uneven sides as a self-leveling sealant will. Many people will use a non-sag sealant on the edges.
Complete Roof Sealant
If you need to seal the entire roof of your RV, you can look for a sealant that is intended for the complete roof. A self-leveling or non-sag sealant is made for seams and edges. A complete roof sealant will be something that you will apply with a paintbrush, and you can coat the entire top of the roof.
Can You Reseal An RV Roof Yourself?
Yes, many people reseal their RV roofs themselves. It is not a difficult job and should only take a couple of hours of time.
This is something that can even be completed while you are hooked up at a campground.
If you want to hire a professional to complete the job, you can, but resealing an RV roof is an easy DIY job that can be completed at home with minimal materials.
How Much Will It Cost To Reseal An RV Roof?
The cost of resealing an RV roof will vary depending on whether you hire a professional to complete the job for you or if you choose to complete it at home yourself.
If you take the RV somewhere to have a professional reseal the roof, you could potentially be spending at least $1,000.
This cost will increase if you have a large RV or extensive damage that needs to be repaired.
However, if you choose to reseal the roof at home yourself, then you are most likely looking to spend around $250-$500 to complete the resealing.
How Frequently Should You Reseal Your RV Roof?
You should inspect your RV roof at least once per year at a minimum. It is good practice to examine your roof 3 to 4 times per year. This will allow you to find damage before it becomes a problem and causes a leak.
Most likely, you will need to reseal your RV roof once per year, even if it is just very small repairs. This may vary depending on if you live in your RV or use it occasionally and if it is exposed to the elements or stored indoors.
Why Do You Need To Reseal Your RV Roof?
Maintaining your RV is important to lengthening the life of your RV and preventing any serious problems from arising. Inspecting and resealing your RV roof is part of this process and should be done every 3 to 4 months.
Sealant Wears Out
The original sealant on the roof of your RV can wear down over time. It is normal for this sealant to break down, especially if your RV is exposed to the elements and you are using it on a frequent basis.
If your RV is parked indoors, then you may find that you do not need to reseal your RV roof as often. Failure to repair sealants will result in water leaking into the RV and potentially causing extensive damage.
RV Age
If your RV is older and the roof has not been resealed, then it is most likely going to need to be done soon. The normal wear and tear on an RV can cause the roof to need to be resealed as the RV gets older, even if it is not exposed to the elements.
Accidental Damage
Occasionally your roof may need to be resealed due to damage that has occurred. This could be from walking on the roof of the RV in places you should not, extreme weather such as hail and strong winds, or even something falling onto the roof of the RV. Anytime an incident such as one of these occurs, you will need to carefully inspect the roof.
In these instances, the sealants on the roof will be under stress and can potentially crack, which would lead to needing to be repaired and resealed.
Screw Comes Loose
If a screw somewhere on the roof becomes loose and pops out then it may end up creating a gap in your roof that allows water to leak through.
This is why it is important to inspect your roof regularly so you can catch small issues that come up before it becomes a big problem.