
DIY Composting Toilet: A Step-by-Step Guide
If you’re looking for an eco-friendly and cost-effective alternative to traditional flush toilets, a DIY composting toilet may be just what you need. Composting toilets are designed to break down human waste into nutrient-rich compost that can be used to fertilize gardens and crops. They’re also ideal for off-grid living or for those who want to reduce their water usage.
You may also find my article on alternatives to septic systems for cabins helpful, too.
How do you build a DIY composting toilet?
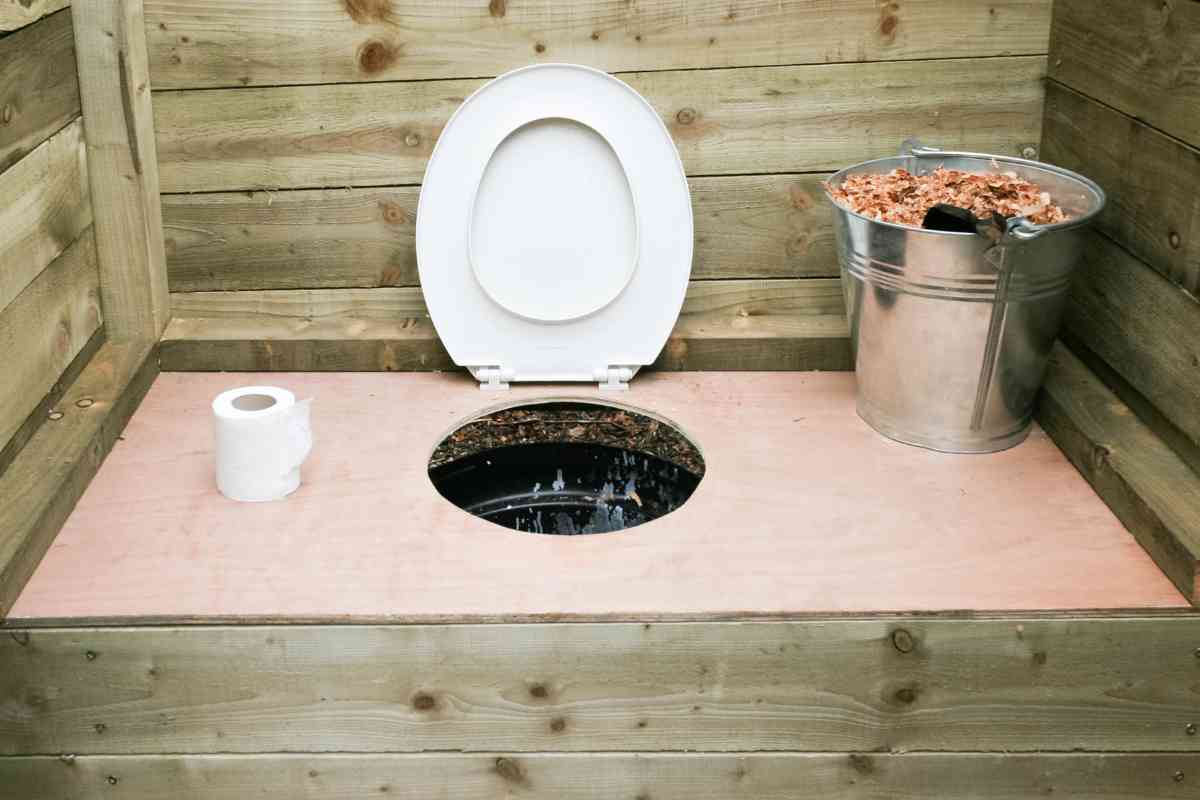
To make a DIY composting toilet, begin by constructing a plywood box with an opening for a toilet seat. Utilize a 5-gallon bucket with a fan for ventilation and another with a urine separator. After each use, add cover material, like sawdust or peat moss, to absorb moisture and reduce odors.
Building your own composting toilet can be a simple and rewarding project. There are a variety of designs and styles to choose from, ranging from basic bucket toilets to more complex systems that use fans and ventilation to speed up the composting process.
Some designs can even be made using recycled materials, making them an even more sustainable option.
While composting toilets may not be suitable for everyone, they offer a great solution for those who want to reduce their environmental impact and live a more self-sufficient lifestyle. In the next section, we’ll take a closer look at the benefits of composting toilets and explore some of the different types of DIY designs that you can try.
Understanding Composting Toilets
Composting toilets are a unique type of toilet that uses the natural process of decomposition to break down human waste into compost. This compost can then be used as a nutrient-rich fertilizer for plants and gardens. Composting toilets are becoming increasingly popular among eco-conscious individuals who want to reduce their impact on the environment.
How Composting Toilets Work
Composting toilets work by separating liquid and solid waste. Solid waste is collected in a container or compost bin where it is mixed with a carbon-rich material like sawdust or straw. This mixture is then left to decompose naturally over time, turning into compost. Liquid waste is either collected separately or drained away into a soakaway pit.
The decomposition process is facilitated by microorganisms that break down the waste into its component parts. This process generates heat, which helps to kill off any harmful bacteria and pathogens. The resulting compost is safe to handle and can be used as a fertilizer for plants and gardens.
Why DIY Composting Toilet
If you’re looking for a sustainable and environmentally friendly way to manage your waste, a DIY composting toilet might be the perfect solution for you. Not only is it a great way to reduce your carbon footprint, but it can also be a fun and rewarding DIY project.
Building your own composting toilet can be a much more affordable option than purchasing a pre-made one. It also gives you the opportunity to customize the design to fit your specific needs and preferences. Plus, you can feel proud of yourself for creating something useful and sustainable with your own two hands.
One of the great things about a DIY composting toilet is that it can be used in a variety of settings. Whether you’re living in a tiny house, cabin, RV, or van, a composting toilet can be a comfortable and convenient way to manage your waste. Plus, as the owner of the toilet, you have control over how often the compost is emptied and used as a resource for your garden.
When building a DIY composting toilet, it’s important to keep in mind that there are different types of composting toilets to choose from. Some require electricity, while others do not. Some use a fan to help with ventilation, while others rely on natural ventilation. You’ll want to choose a design that works best for your specific situation.
Here is a table that summarizes some of the pros and cons of a DIY composting toilet:
| Pros | Cons |
| Environmentally friendly | Requires regular maintenance |
| Can be customized to fit your needs | May require a bit of a learning curve |
| Can be used in a variety of settings | May require some trial and error to get the composting process right |
| Can be a fun and rewarding DIY project | May not be as comfortable as a traditional flushing toilet |
| Can be a resource for your garden | May not be for everyone |
A DIY composting toilet can be a great way to reduce your environmental impact while also providing a practical solution for managing your waste. With a bit of research and some DIY skills, you can create a toilet that is both functional and sustainable.
The Humanure Handbook
No products found.
If you’re interested in learning more about composting toilets and the benefits of recycling human waste, The Humanure Handbook is a great resource. It provides detailed instructions on how to build and maintain a composting toilet, as well as information on the science behind composting and the benefits of using humanure as fertilizer.
Building Your DIY Composting Toilet
Building your own DIY composting toilet is a great way to save money and reduce your environmental impact. Here are some steps to help you get started:
Materials
Building your own composting toilet can be an affordable and eco-friendly solution for off-grid living or reducing your environmental footprint. Here are the materials you will need to get started:
| Material | Quantity | Purpose |
| Sawdust | As needed | Cover material |
| Wood | As needed | Construction of the toilet seat and box |
| Toilet seat | 1 | For sitting on |
| Buckets | 2 | For collecting waste |
| 5-gallon bucket | 1 | For mixing cover material and waste |
| Plywood | As needed | For constructing the box |
| Fan | 1 | For ventilation |
| Screws | As needed | For attaching the seat and box |
| Hardware | As needed | For attaching the seat and box |
| Urine separator/diverter | 1 | For separating urine from solid waste |
| Urine container | 1 | For collecting urine |
| Funnel | 1 | For directing urine into container |
| Cover material | As needed | Peat moss, straw, wood ash, dry leaves, crushed leaves, coconut coir, or wood chips |
| Pocket hole jig | 1 | For creating pocket holes in wood |
| Electric drill | 1 | For drilling holes |
| Jigsaw | 1 | For cutting wood |
| Woodworking file | 1 | For smoothing edges |
| Sandpaper | As needed | For sanding edges |
Steps
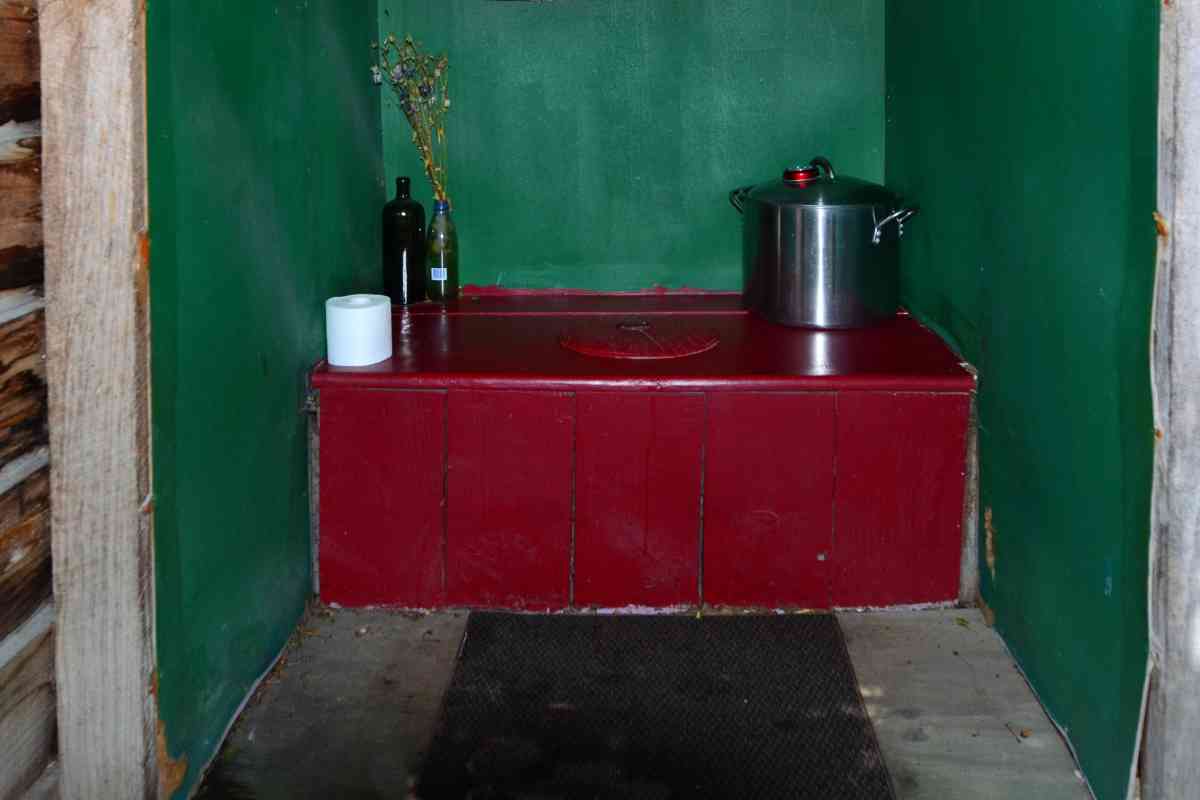
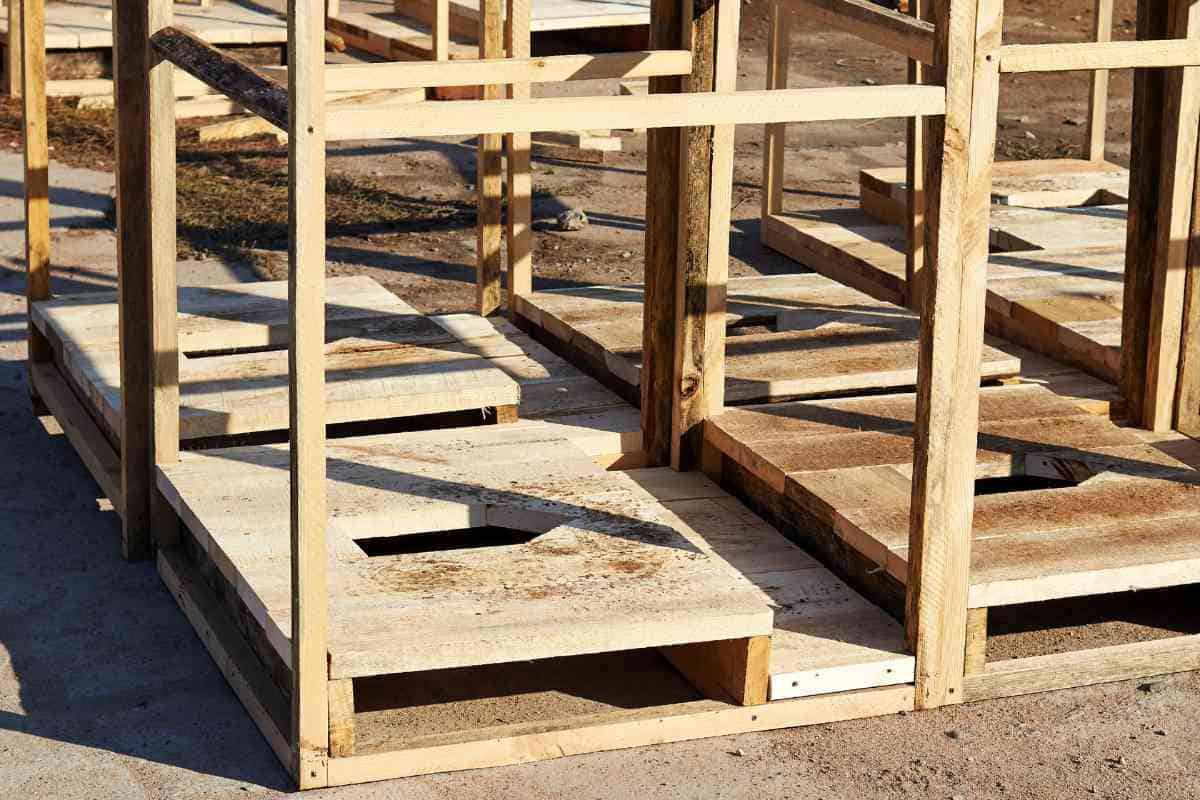
- Begin by building the plywood box or wooden box. Use the pocket hole jig to create pocket holes in the planks of wood. Assemble the box using screws and hardware, making sure to leave an opening for the toilet seat.
- Cut a hole in the lid of one of the 5-gallon buckets, and attach the fan to the lid using screws. This will provide ventilation for your composting toilet.
- Install the urine separator or diverter in the other 5-gallon bucket. Use the funnel to direct urine into the container.
- Place the box over the bucket with the urine separator, and attach the toilet seat to the box.
- Add cover material to the composting toilet after each use. This will help to absorb moisture and reduce odors. Some good materials to use include peat moss, straw, wood ash, dry leaves, crushed leaves, coconut coir, or wood chips.
- Empty the urine container regularly, and use it to fertilize your garden. The solid waste will compost over time, and can be used as fertilizer as well.
By following these steps, you can build your own DIY composting toilet and reduce your environmental impact.
Using and Maintaining Your DIY Composting Toilet
Congratulations on building your own composting toilet! Now that you have it installed, it’s important to know how to use and maintain it properly. Here are some tips to help you get started:
Using Your Composting Toilet
Cover Material: Always keep a container of cover material (such as sawdust, peat moss, straw, wood ash, dry leaves, crushed leaves, coconut coir, or a mixture of these) next to your toilet. Each time you use the toilet, add a scoop of cover material to the bowl to help absorb excess liquid and prevent foul odors.
- Dry Material: It’s important to add dry material (such as sawdust, wood chips, or dry leaves) to the compost pile regularly to help balance the moisture levels and promote decomposition.
- Humanure: When using a composting toilet, it’s important to remember that humanure is a valuable resource that can be used to fertilize plants. However, it must be composted properly before use. Make sure to follow the guidelines for composting humanure carefully to avoid contamination.
- Fertilizer: Once your compost pile has finished decomposing, you can use the finished compost as a natural fertilizer for your plants.
Maintaining Your Composting Toilet
Compost Pile: Make sure to maintain your compost pile properly by adding enough dry material, turning it regularly, and monitoring the moisture levels. This will help promote decomposition and prevent foul odors.
- Excess Liquid: If you notice excess liquid (also known as leachate) accumulating in the bottom of your composting toilet, it’s important to drain it off regularly to prevent overflow and odor.
- Sawdust Toilet: If you’re using a sawdust toilet, make sure to add enough sawdust to the bowl to help absorb excess liquid and prevent foul odors. You may also need to add more sawdust to the compost pile than you would with other cover materials.
Remember, using and maintaining a composting toilet requires a bit of effort and attention, but it’s worth it for the environmental benefits and cost savings. With these tips, you’ll be well on your way to a successful composting toilet system.
Special Considerations for RV and Tiny House Composting Toilets
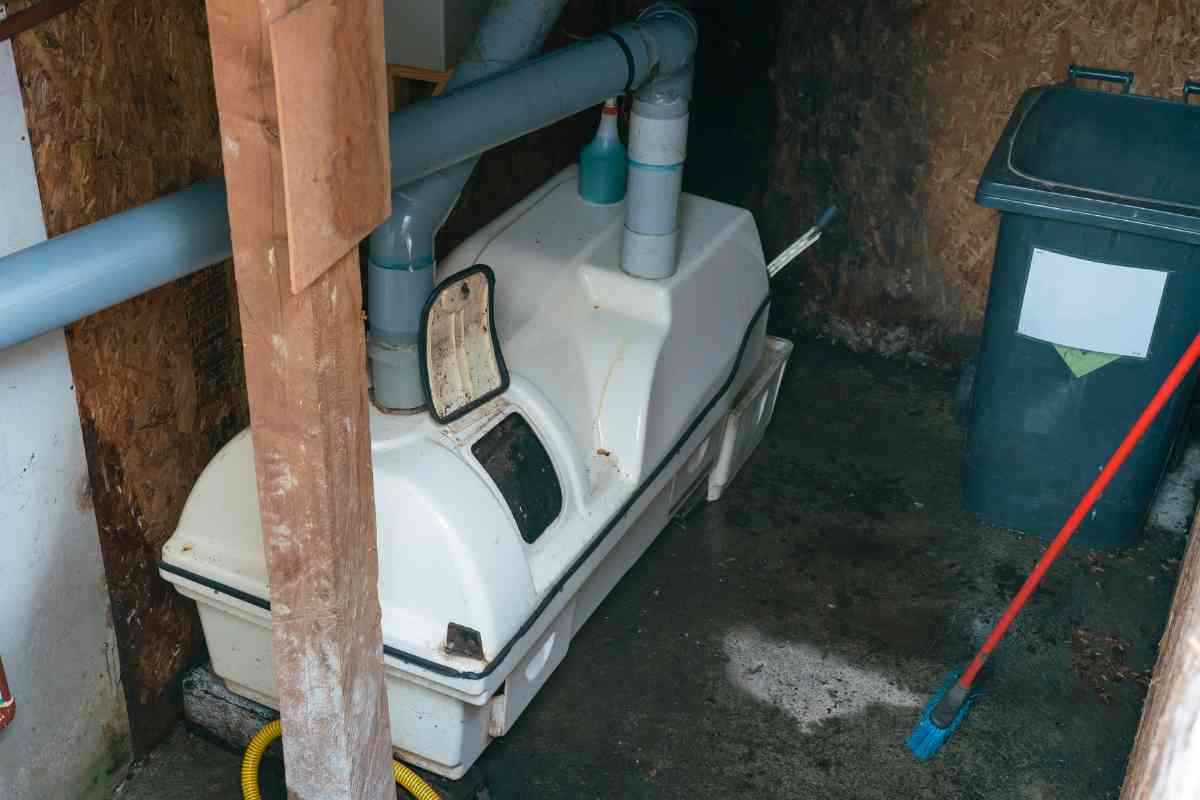
If you’re planning to install a composting toilet in your RV or tiny house, there are a few special considerations you need to keep in mind. The limited space available in these types of living spaces means that you need to choose a composting toilet that is compact and efficient, while still being durable and easy to use.
One of the first things to consider is the available space in your RV or tiny house. You’ll need to choose a composting toilet that fits within the available space, while still providing enough room for comfortable use. You may also need to consider whether you want a self-contained unit or one that is connected to a central or remote compost chamber.
Another important consideration is the durability of the composting toilet. RVs and tiny houses are often used off-grid, which means that you’ll need a toilet that can withstand the rigors of travel and use without breaking down. Look for a composting toilet that is made from high-quality materials and is designed to last.
If you’re installing a composting toilet in an RV or tiny house, you may also need to consider the availability of electricity. Some composting toilets require electricity to power fans or other components, while others are completely self-contained and don’t require any external power source.
When choosing a composting toilet for your RV or tiny house, you should also consider whether you need a urine separator or diverter. These devices help to separate urine from solid waste, which can help to reduce odors and make the composting process more efficient. You’ll also need to consider whether you want to use a separate container to collect urine or if you want to divert it into the compost chamber.
Finally, you should consider the type of fan that the composting toilet uses. Many composting toilets use computer fans to help circulate air and promote the composting process. Look for a fan that is quiet and efficient, and that can be easily replaced if necessary.
| Consideration | Description |
|---|---|
| Available Space | Choose a composting toilet that fits within the available space |
| Durability | Look for a toilet made from high-quality materials that is designed to last |
| Electricity | Consider whether the toilet requires external power |
| Urine Separator | Decide whether you need a urine separator or diverter |
| Fan | Look for a quiet and efficient fan that can be easily replaced |
Conclusion
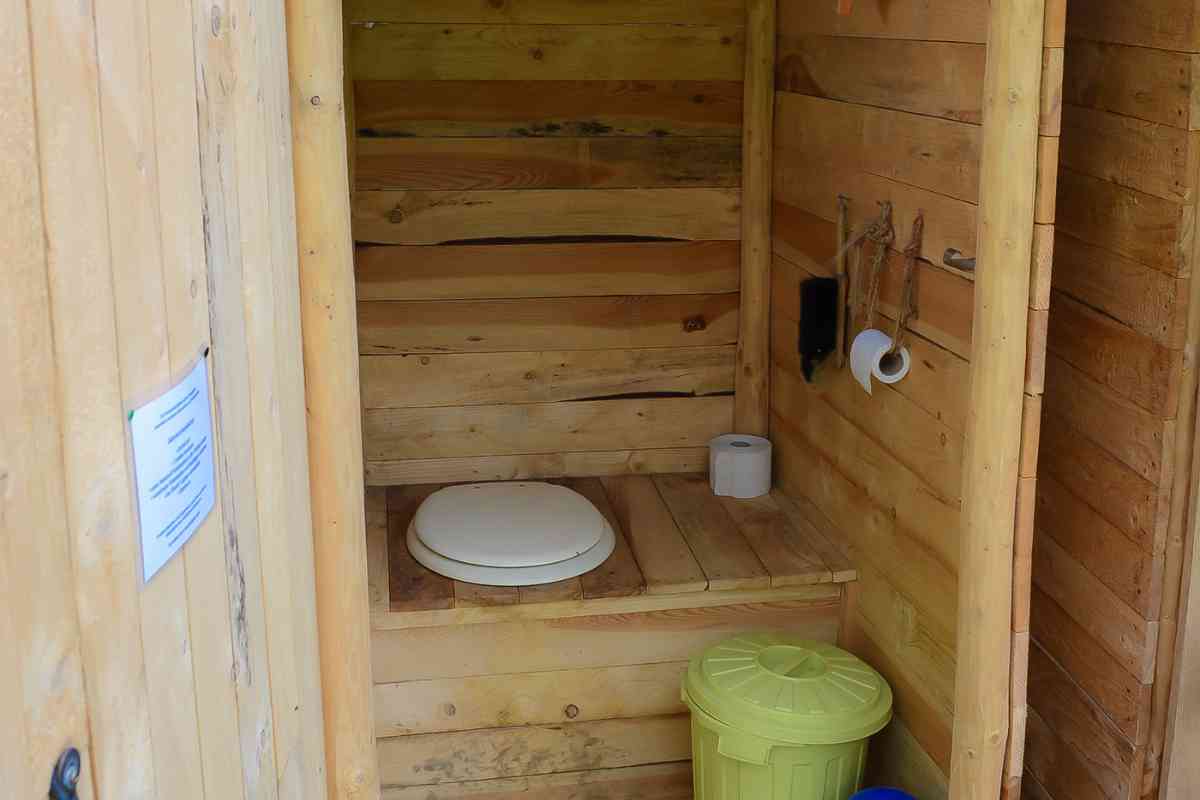
The evolution of composting toilets has marked a significant shift towards sustainable sanitation, especially in settings like tiny homes and RVs. As more individuals become conscious of their environmental footprint, embracing this eco-friendly approach goes beyond the mere act of poop management. Whether you’re in a bathroom in a modern home, an outhouse in the countryside, or mobile accommodations like campers, the ability to turn waste into a resource is remarkable.
While the thought of diving into plumbing and installing systems with pipes, hoses, and vents might seem daunting, the DIY nature of some of these setups allows for personalized adjustments. You might find yourself using a five-gallon bucket, crafting a frame from pieces of plywood, or even incorporating a urine diverter to enhance the efficiency of waste separation. Moreover, the added control lets you decide on materials—like opting for biodegradable toilet paper or using vinegar as a cleaning agent.
However, just as with any other DIY project, the journey of building a composting toilet can have its hassles. It’s essential to remember that it isn’t just about the installation but also the maintenance. Whether it’s the choice of cover materials or the hinges of your setup, every detail can affect the experience.
Frequently Asked Questions
How can I prevent my DIY composting toilet from smelling?
To prevent your DIY composting toilet from smelling, you need to make sure that you are adding enough carbon-rich materials, such as sawdust or shredded paper, to the toilet after each use. This will help balance out the nitrogen-rich waste and prevent odors from developing. You should also make sure that the toilet is well-ventilated to allow for proper airflow, which will help prevent moisture buildup and the growth of odor-causing bacteria. Additionally, you can add natural odor-absorbing materials, such as cedar chips or coconut coir, to the toilet to help neutralize any odors that do develop.
What are the dimensions for a DIY composting toilet?
The dimensions for a DIY composting toilet can vary depending on the design you choose. However, a standard size for a bucket-style toilet is a 5-gallon bucket with a height of around 18 inches and a diameter of around 12 inches. If you are building a larger toilet, such as a two-chamber system, the dimensions will be larger to accommodate the additional chambers.
What is the cost of building a DIY composting toilet?
The cost of building a DIY composting toilet can vary depending on the materials you choose and the design you select. A basic bucket-style toilet can be built for as little as $20 using a 5-gallon bucket and a toilet seat. However, if you choose to build a more complex system, such as a two-chamber toilet with a urine separator, the cost can be closer to $200 or more.
How long does it take for a composting toilet to compost?
The amount of time it takes for a composting toilet to compost can vary depending on several factors, such as the temperature and humidity levels in the composting chamber, the type of waste being composted, and the size of the toilet. In general, it can take anywhere from a few months to a year or more for the waste to fully compost. However, you can speed up the composting process by adding additional carbon-rich materials and maintaining optimal moisture and temperature levels.
Can a DIY composting toilet be used in a van?
Yes, a DIY composting toilet can be used in a van. In fact, many van dwellers and RVers choose to use composting toilets as a more sustainable and eco-friendly alternative to traditional toilets. When building a composting toilet for a van, you will need to consider the available space and choose a design that is compact and easy to use. You may also want to consider using a urine separator to reduce the amount of liquid waste that needs to be emptied.
How do I use a urine separator with a DIY composting toilet?
To use a urine separator with a DIY composting toilet, you will need to install the separator between the toilet seat and the composting chamber. When using the toilet, you will sit on the seat as you normally would, but any liquid waste will be diverted into a separate container or tank. This helps to reduce the amount of liquid waste that needs to be composted and can make the composting process more efficient. You will need to empty the urine container regularly to prevent odors and ensure that the toilet continues to function properly.